Worth a thousand words
Using materials you have at home, you can make an eco-friendly present mom will love to show off! Kids should work with an adult for safety (and fun)!
1. Gather your materials.
You’ll need:
- Cardboard (old cereal boxes, other thin food packaging boxes)
- Paper grocery bag
- Pencil
- Ruler
- Scissors
- X-acto knife
- Glue (glue stick works well)
- Bone folder or the back of a spoon (for creasing and rubbing paper)
- Ribbon or other decorative string
- Colored pencils, crayons, markers, or other things to decorate with
- Two 4” X 6” photos
- Rubber stamps, collage papers, stickers (optional)
2. Open out the paper grocery bag and cut out a piece of the paper measuring 8.5” X 14” — you can iron it on a low setting to remove the wrinkles, if you like.
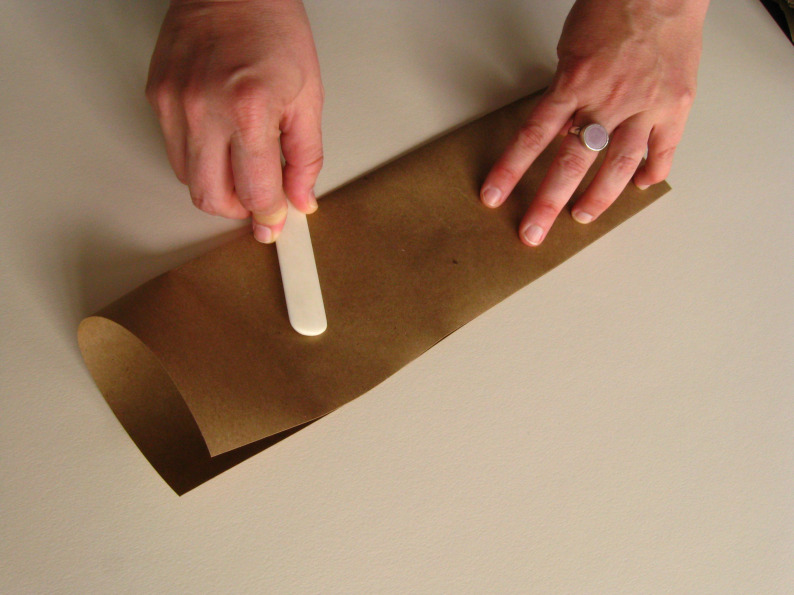
3. Fold the paper in half as shown, open back up and fold it in half the other way.
4. Using your ruler, draw lines as shown. Each segment is 1/2” wide. For the interior lines, measure from the creases.
5. On the upper rectangles, cut half inch segments as shown.
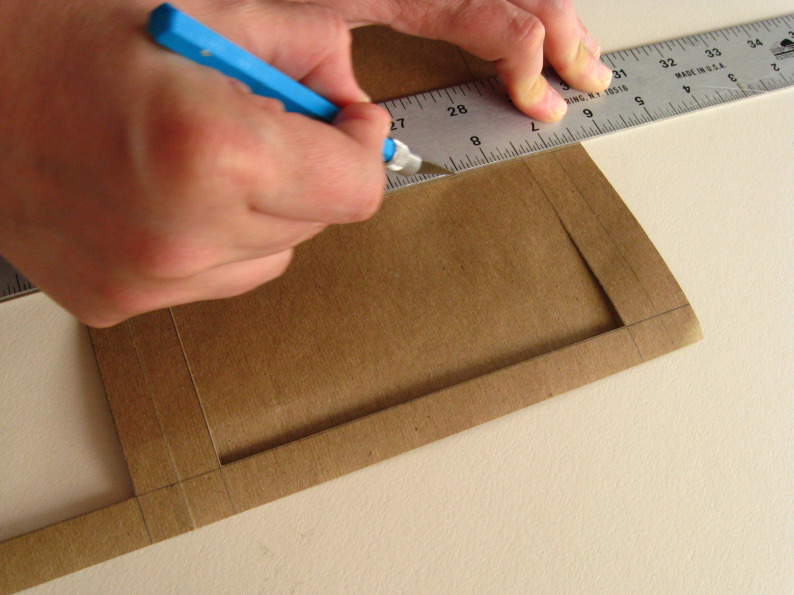
6. With a craft knife and ruler, carefully cut out the windows you created on the bottom two rectangles when drawing the margins. These will be the frames.
7. Using a strong glue stick (I used disappearing blue glue for illustration purposes) put a thin line of glue along the center crease between the frame cut-outs.
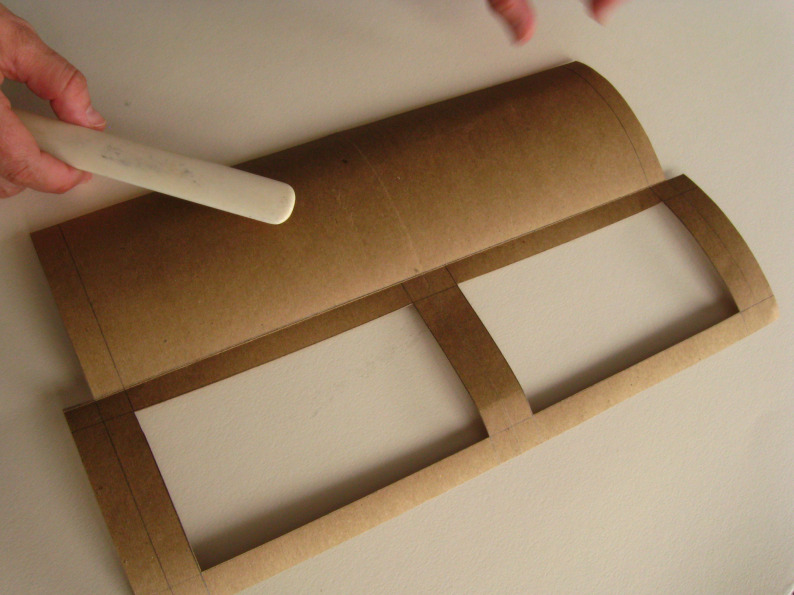
8. Fold the paper in half and press the crease with your bone folder or spoon to seal the middle.
9. Turn the whole thing over and put glue on the flaps that stick out.
10. Then fold them over and rub to stick to the back of the frames.
11. Glue a ribbon to the back of both short edges of the frames, leaving ends free to dangle. Set aside for a moment
12. Open out the cereal (or other) box and cut out two rectangles measuring 4.25” X 6.5”.
13. Glue the entire back of one piece of cardboard.
14. Carefully line up the cardboard cover with the back of one half of the frame, rub with bone folder or spoon. Make sure to leave the ribbons free.
15. Repeat with the other half of the cardboard.
You are done! You can press this under a heavy book for a couple hours so it can dry nice and flat. Decorate as you wish! I’ve used stamps and crayon and colored pencil on my folding frame wallet.
Put two photos in the frame, or a photo and a poem you’ve written for your mom, or a drawing or painting you’ve made for her. This project is designed for 4 x 6 photos, so make sure your art or poem is that size.
(Photos by Phil Nunnally)
-
Recommend this
on Facebook -

Report an error
-

Subscribe to our
Weekly Digest


There is 1 reader comment. Read it.